DIY Projects

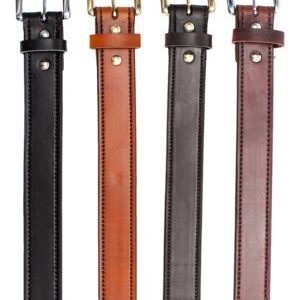
15% off Store Wide of All Leather Craft Supplies

Get all your leather supplies for crafts and more with the link below. Use our promo code BF2023 for 15% off store wide

Weaver Leather Supply – Leathercrafting and Leatherworking Supplies

LINK BELOW:

https://www.weaverleathersupply.com/?ref=mtrcl


Different Types Of Belt Buckles: Which One Is Right For You?

Greetings, buckle enthusiasts!

From the humble prong buckle to the flashy western-style trophy buckle, these little accessories can make a big statement about your personality and style.

Belt buckles are more than just a functional accessory to hold up your pants. They can be a fashion statement, a symbol of achievement, or simply a way to express your individuality.

Whether you’re a cowboy or a city slicker, there’s a buckle out there that’s just right for you. In this article, we’ll explore some of the different types of belt buckles and what makes them unique.

Let’s get started.

HEEL BAR BUCKLES – THE CLASSIC CHOICE
Heel Bar Buckle

The heel bar buckle is one of the most common types of belt buckles and for good reason. The bar runs across the heel of the buckle, and when you use one of these, you’re going to need to add a loop or a “belt keeper.”

That’s going to hold down the tongue of the belt or the strap. Weaver Leather Supply sells all manner of pre-made keepers, including decorativemetal, and veg tan. For veg tan, if you dye the project, you can dye the keeper so it will be a perfect match.

There is an unlimited variety of heel bar buckles in terms of fashion, western, period, basic, utility, sizes, colors, and finishes. You can buy the buckle first and then design the belt around the buckle design. It’s a classic choice that never goes out of style.

BUY HERE

CENTER BAR BUCKLES – THE BUILT-IN KEEPER
Center Bar Buckles – The Built-In Keeper

center bar buckle is another popular choice that doesn’t require a separate belt keeper.

The bar goes right across the center so you don’t need a keeper because the buckle is the keeper. You can also have a two-pronged center bar so all you have to do is punch two oblong holes. This type of buckle is great for a clean, minimalist look.

TROPHY BUCKLES – FLASHY & FASHION-FORWARD
Trophy Buckles – Flashy and Fashion-Forward

If you’re looking for a more statement piece, then the trophy buckle is a great option. You don’t need an oblong or even a keeper for this buckle. It’s a popular choice for sports teams, rodeo riders, and other organizations that want to show off their accomplishments. You can get a trophy buckle with your name, logo, or design engraved on it.

There’s nothing wrong with making it personal!

BUCKLE SETS – MULTIPLE BEAUTIFUL DESIGNS
Buckle Sets – Multiple Beautiful Designs

Weaver Leather Supply has multiple, beautiful buckle sets with many different designs. They can be customized to match your style and preferences. Buckle sets typically include a buckle, a keeper, and a tip. Some sets also include conchos or other decorative elements.

These sets are a great option for those who want a coordinated look from top to bottom. Is that you?

CONWAY BUCKLES – AN UNDERAPPRECIATED GEM
Conway Belt Buckles

You don’t see Conway buckles often, but they have great benefits. You don’t need a keeper, oblong, screws, or snaps. All you need is a line of holes. If you have a strap that needs to be adjusted from time to time or you want to bring two straps together, this is a perfect choice.

It’s different to master the movement on this buckle, but once you do, you’ll appreciate the simplicity and versatility.

TIME TO SECURE THE BUCKLE

Let’s talk about the most underrated and often overlooked part of a belt – the buckle. Buckles are the unsung heroes that keep your pants up and add a touch of personality to your outfit. But, did you know there are different ways to secure your buckle? Here are some highly efficient ways to make your belt stand out.

  1. THE RIVET – Heavy-Duty HeroesIf you want a secure buckle that can withstand any adventure, rivets are your heroes. Double cap rivets104 tubular rivets, and solid copper or solid brass rivets and burrs make great options. Check out our full selection to add just the right touch to your project. Not only do they look great, but they’re also durable and easy to set.
  2. LINE 24 SNAP – The Buckle SwapperIf you like to change your buckle often, the line 24 snap is the perfect option for you. It’s good for 7-8 ounce or 8-9 ounce leather and comes in multiple finishes. Swap out your buckle to match your outfit without any hassle.
  3. LINE 20 SNAP – The Lightweight ChampIf you have a lighter leather belt, the line 20 snap is the way to go. It’s perfect for a 4-5 ounce or 5-6 ounce leather and comes in multiple finishes. Keep it simple and secure with this lightweight champ.
  4. CHICAGO SCREW – The Strong and Easy OptionIf you want a buckle that’s strong and easy to swap out, the Chicago screw is your go-to option. It’s a threaded rivet with two big benefits.First, it’s easy to install and remove, so you can change your buckle with ease. Second, it’s strong enough to use on high-stress points on your leather belt. Weaver Leather Supply even adds a slot for an Allen wrench on this rivet to make installation a breeze.

SEWING – THE BELT STRENGTHENER

If you’re looking to add some extra strength to your belt, sewing is a great option. However, traditional production belts are sewn across the belt, which can weaken the belt’s strength. Instead, sew along the edges of the belt to maintain its strength. If you’re using a heel bar buckle, you’ll need to add a keeper, which can become tedious with multiple stitch lines. If you’re not feeling up to sewing or securing your buckle with rivets or snaps, a simple knot can add personality to your belt. Get creative with different knots to add some flair to your outfit.

BUCKLE UP AND GET STARTED!

Adding a new buckle to your leatherwork project is an excellent way to personalize and elevate your creation. Whether you opt for a heel bar or center bar buckle, a trophy buckle, or a Conway buckle, each option offers a unique look and functionality. Don’t be afraid to experiment and have fun with your leatherworking projects. Ultimately, the best belt buckle is the one that fits your design and style preferences.

Fortunately, there are endless possibilities!

PREMADE BELTS CAN BE PURCHASED HERE:

https://www.mtrcustomleather.com/product-category/gun-belts/

MTR offers a wide range of custom belts manufactured in USA. Each belt is custom made to order by one of our leather professionals. MTR uses only the top grade leather to construct each belt. With heavy duty nylon stitching to resist wear, tearing and dry rotting. When choosing your MTR belt you will find many options to choose from: size, color, stitching color, stiffeners, hardware type and a few more depending on the belt type that one chooses. If you do not see an option that you are needing, than please feel free to call us (336)879-2166 or email us at sales@mtrcustomleather.com. We will be glad to assist you!

Have you lost a screw? Want a different buckle for your belt? This is the place to be. MTR Custom Leather hardware section is an easy way to replace your current or lost hardware. This section allows you to purchase screws, metal and leather washers, holster clips, tee nuts and buckles. Only the best hardware for your leather goods. Check our MTR Custom Leather hardware section. All hardware is usually in stock and will ship within 3 business day! Need additional hardware check out our affiliated link https://www.weaverleathersupply.com/?ref=mtrcl

Three Top Leatherworking Tools

An Overview of Three Top Leatherworking Tools

1. Hammers

Hammers

Leatherworkers have a variety of hammers to choose from in today’s marketplace. With a rounded face that helps prevent marring of the leather, our favorite Leatherworking Hammer is a handy, versatile tool that’s great for sharp folds, forming leather, tapping stitches and lace, adhering cemented parts and “blocking” leather keepers.

While leatherworking hammers are great for a variety of tasks in your workshop, you’ll want to advance to a good mallet or maul for leather stamping, leather tooling, and more advanced leatherworking techniques.

SHOP NOW

2. Mallets

Leather mallets come in different materials and weights to meet your needs. Take a few minutes to explore the options and determine which are top contenders to earn a place on your workbench.


POLY MALLETS

An image of Poly Mallet in usePoly mallets (plastic mallets) are the next level up from wooden mallets; they’re inexpensive and available in a wide variety of weights and sizes.

  • 9 oz. poly mallets are great for setting rivets, stamping and tooling.
  • 14 oz. and 19. oz. mallets are also available. While they offer a bit more power, please be aware that they could become heavy for repetitive use on more time-consuming leather projects.

You’ll find that durability is the main benefit of plastic mallets. With little or no evidence of wear after extended use, the longevity of a poly mallet makes it a trusted leatherworking tool you’ll have on your bench for years.

DISCOVER INSIDER TIPS ON POLY MALLETS IN OUR MALLETS & MAULS TUTORIAL:

Another widely-used option, with some distinct advantages compared to a poly mallet, is a traditional rawhide mallet.

SHOP NOW

RAWHIDE MALLET

An image of Rawhide Mallet in useRawhide mallets, though lacking the durability of poly mallets, offer a steadier and more consistent impact on leatherworking tools including: leather stampsleather punches and rivet setters. Rawhide mallets are popular in 11 oz. and 20 oz. sizes, and the heavier option is better reserved for tasks like setting copper rivets or tubular rivets.

SHOP NOW


Which mallets have more to offer, plastic mallets or rawhide mallets?

Again, it comes down to personal preference in the end…however, it is good to keep in mind that:

Poly mallets are susceptible to stuttering or double bouncing, especially when striking a tool with a lot of force—in some cases, a tool may even fly off the granite with a hard hit using a plastic mallet.

So, what rawhide mallets lack in durability, they make up for in stability. Also, when rawhide mallets begin to wear down, you can sand down the worn end to replenish years of utility.

In addition, a lighter weight rawhide mallet is a great high-endurance alternative for tasks requiring a bevel.

PRO TIP FOR SETTING A RIVET, EYELET, GROMMET, OR SNAP

When setting rivets, eyeletsgrommets or snaps, you’re looking for moderate weight for some nice control. A mid-weight rawhide mallet offers good, clean punches every time.

WOODEN MALLETS

Wooden mallets are at the very bottom of the totem pole for leatherworking performance. They’re cheap, and they lack weight and durability. Unless you only need a mallet for a one-time job as a stop-gap option, you’ll want to step up from a wooden mallet.

SHOP NOW

3. Mauls

An image of a Maul

For many pro leather toolers, once they start working with leather mauls, they don’t go back. There are a few reasons.

  • Well balanced– Mauls feel stable in the hand, making it easy to hit the tool soundly and consistently.
  • Round face– As opposed to using square-faced mallets, mauls allow more room for error when striking the tool. It’s not necessary to hit the tool on the center of the face to use a maul effectively. The circular face also significantly reduces the possibility of deflections.
  • Rocking vs. Hitting– Mauls are used with a rocking motion of the wrist, as opposed to the hammer-like hitting motion of a mallet. While it takes some getting used to, using a maul over a long work session takes less energy and puts less stress on the body. For pro leather craftspeople who spend many hours a day tooling, mauls make sense from this standpoint.

SHOP NOW

TOOLING & STAMPING

Weight options:

  • 16 oz.: good for very delicate tooling, but not as effective for most leather tooling purposes.
  • 24 oz.: a solid weight, and highly versatile…the downside is that the heavier weight may cause increased fatigue before a task is finished, which can lead to issues with concentration and poor hits on the tool, making for bad or inconsistent leather stamping.


SHOP NOW

LEATHER PUNCHING

For striking a leather punch with power and accuracy, a 1-1/2 to 2 lb. maul is a good bet for consistent performance.

32 oz.– 48 oz.: these weight classes are reserved for heavy-duty leather punching tasks, involving large oblong punches and strap end punches. One good strike goes right through!


For even more power, you could choose a 3 lb. maul for striking oblong and strap end punches. You’ll trade some finesse with brute force with a heavier maul. However, the best part about a giant maul is that even if you don’t connect clean and flat on the tool, you’re still going to get a good punch every time, and the tool does all the work.


SHOP NOW

Final Notes

Well, there you have it. We’ve looked at an assortment of hammers, mallets and mauls and their most appropriate applications. Essentially, they all do the same job, but each is a little more refined to a specific job in your shop.

For a walk-through of specific applications of various mallets and mauls, check out this helpful tutorial from our leathercraft expert Chuck Dorsett:


If you’re on a budget and focused on beginner leather projects, like leather keychains, leather mousepads, leather pouches, leather card wallets, leather watchbands or leather earrings, we recommend a rawhide mallet. It’s affordable, durable, comfortable in the hand, and will do any job in your shop.

SHOP NOW

DOWNLOAD HAMMER, MALLET & MAUL PROJECT RECOMMENDATIONS PDF

Now that you’re equipped with some expert advice on mauls, mallets, and hammers, you’re ready to select the right one for your needs and budget. Adding the right leatherworking tools to your workbench is the secret to success throughout your leatherworking journey.

SHOP NOW

Getting Started in Leathercrafting

Getting Started in Leathercrafting

If you enjoy expressing yourself through creative hobbies, leatherworking and leathercrafting are sure to provide plenty of inspiration with a wide range of projects perfect for a variety of skill levels and style aesthetics. To get you started out right, this beginner’s guide to making leather goods is packed with project tutorials, recommended leatherwork tools, basic leatherworking skills, and more! With just a few inexpensive leatherwork tools, online instruction and tutorials from industry experts, and your own imagination, you’ll be poised to successfully complete your first leathercraft project at your own kitchen table or in your workshop.


Buy Here:


6 HELPFUL TIPS

1. Leather project selection simplified

When you first embark on your leathercraft journey, take a look at a variety of leather projects for beginners and select one that appeals to your unique interests and sense of style. A smaller leather project with a manageable completion time will give you the opportunity to practice easy-to-learn skills and techniques that will serve as a foundation for more advanced projects in the future.

NEED SOME INSPIRATION?

Leather Keychain, a Leather Mousepad, a Leather Pouch, a Leather Card wallet, a Leather Watchband, and more can make great first projects. Explore some leather project ideas and tutorials to select the right project for you. Also, be sure to download our free leather patterns featuring our popular card wallet holder and shortie belt templates for even more inspiration! Discover leather project tutorials Here.

DOWNLOAD FREE LEATHER PATTERNS BELOW:

Free Card Wallet Holder Pattern
Free Shortie Belt Pattern


2. Affordable Leathercrafting supplies

As with any new hobby, you’ll want to try out leathercrafting without breaking the bank! Selecting leather and supplies that are easy on the budget allow you to focus your attention on experiencing the thrill of working on your first project and learning new skills instead of worrying about possibly making mistakes and hesitating to cut into higher-priced leathers. Your first leather project is an opportunity to express your creative spirit through the art of leathercraft. Check out videos on this page for an overview of leathercraft expert Chuck Dorsett’s tool and leather recommendations for newbies as well as a more in-depth explanation regarding the different cuts of leather with tips on utilizing cuts like single shoulders and double shoulders in your crafting to give you both quality and affordability.


Which Leather Should I Use For My Next Project
Recommended Leather And LeatherWork Tool For Beginners


3. Basic leathercrafting skills = NOT-SO-BASIC RESULTS

The key to success in any hobby is focusing on the fundamentals. In leathercrafting, you’ll find learning essential skills like cutting, saddle stitching, edge finishing, and leather dyeing will yield knowledge that will serve you well whether you’re on your first or one-hundred-and-first project. Taking the time to master these basics in the beginning will allow you to build upon this strong foundation when tackling more advanced leatherworking projects down the road.

LEARNING BASIC LEATHERWORKING SKILLS:

The Leather Element: 6 Options for Cutting Leather
How to Hand Stitch Leather
The Leather Element: Edge Work
How to Dye Leather


4. The right leatherworking tools for the job

A successful leather project starts with quality tools that get the job done right. When you’re just starting out, you may find you only need a few basics like a Steel Square, a Leather Knife, and a Cutting Surface — a simple piece of plywood can serve as a cutting surface if that’s what you readily have on hand. As your skill level and projects advance, consider adding more supplies including a Marble Slab, a Revolving Punch, a set of Diamond Chisels, a Poly or Rawhide Mallet, a Cutting Board, and a Rivet Setter to your toolbox. After experiencing the ease and versatility the right tools bring to your craft, you’ll be on the lookout for more tools that help you work smarter, not harder.

The lowdown on leather working tools


5. Types of leather demistified

Whether you’re new to leathercrafting or are a seasoned veteran, the number of leathers available for purchase can be intimidating. Here’s an overview of the main types of leather and some of their ideal uses.

VEG TAN NATURALTanned without harsh chemicals using a tightly-controlled process that utilizes tree bark and other natural tannins, this leather is prized for both its beauty and its workability. On average, veg tanned hides undergo a one to three-month process that’s reflected in the beauty, workability and cost of the final product. Project Ideas for Veg Tanned Leather: Strap goods, dog collar, knife sheath, holster sheath, wallet, coin purse, glasses case, key fob, notepad cover, journal cover as well as a plethora of projects you’d like to try stamping, dyeing, and forming/molding techniques.

CHROME TANNED LEATHERThe time involved and expense of veg tanned leathers led to the development of chrome tanning in the mid-1800s. Chrome tanning takes about a day in contrast to the one to three-month veg tanning process, making it a more economical choice. Today, about 80-90% of the world’s leather supply is chrome tanned and it is heralded for its stain and water resistance as well as its consistency in color. Project Ideas for Chrome Tanned Leather: Purses, bags, vests, personal accessories, tassels, liners, filigree projects, decorative inlays, and more.


6. Confidently buy leather your first time & everytime

Whether you’re a beginner or a more advanced leathercrafter, it’s important you buy from a reputable company that stands behind its leather. Because buying leather online without the ability to see it up close and feel it in your hands can be a leap of faith, look for a leather supplier that offers Low Cost Leather Samples and provides Free Shipping on Leather Returns. That way, if for some reason the leather you selected based on an online description and photo does not meet your needs, you’re covered. Our leathercraft expert Chuck Dorsett recommends going with quality leathers in more budget-friendly cuts like a single shoulder or belly in our Affordable Leather for Beginners video. These leathers are available in a range of Thicknesses perfect for a variety of beginner-level projects and are economically priced so you can focus on enjoying your new hobby without worrying about testing out your skills on a higher-priced piece of leather.


Buy Here:


Your success is one of our top priorities at Weaver Leather Supply!

With our free Online Educational resources featuring a wide variety of inspiring leather craft ideas as well as a full range of leather hides, tools, and supplies, you’ll find everything you need to develop your skills for a lifetime of enjoyable leather projects.Our team would love to see what you make with your newfound skills! We invite you to post a photo of your creation and tag us @weaverleathersupply to share your leather art and influence others new to leathercraft!


Buy Here:

https://www.weaverleathersupply.com/?ref=mtrcl 

Shop handmade leather product from a small business in USA with all USA materials. We specialize in all sorts of leathers, even exotic leather like: elephant, stingray, shark, ostrich, giraffe, alligator, caiman, lizard, python, eel, beaver & more. Not only do specialize in exotic leather, but also weapons with lasers, light attachments, red dots, suppressor sights, threaded barrels, compensators & more! All orders are made to order! You design it and choose from all the many options including, thumb break safety strap, sweat shield (body shield), single or double stitching, open or enclosed end, colored stitching, internal liner and many more! MTR Custom Leather wants you to have the perfect holster that functions just the way you like it!

Buy NOW:
https://www.mtrcustomleather.com

Social Media Links:
https://www.facebook.com/MTRCustomLeather/
https://twitter.com/MTRCustomLthr
http://www.instagram.com/mtrcustomleather.com
https://www.pinterest.com/mtrcustomle0877/pins/
https://www.youtube.com/channel/UCtRq6Rq87k-NteeBKQpOYGg
https://www.linkedin.com/in/mtrcustomleather
https://www.tiktok.com/@mtrcustomleather?_t=8gcY88UyRJb&_r=1

Affiliate Program Link: leather, leather tools, patterns and more click the link below:
https://www.weaverleathersupply.com/?ref=mtrcl
https://www.booking.com/index.html?aid=8004446

Customer Service:
em: sales@mtrcustomleather.com
ph: (336) 879-2166 or (336) 879-2767

Check out our sister site: Tactical Gear, holsters, concealment bags, light and lasers attachments, ar parts and more!
http://www.southernedc.com

Check out our EBAY Store:
https://www.ebay.com/usr/mtrcustomleather

After Hours:
*Feel free to google message us or facebook message us
*Visit our site for a fast response with our LIVECHAT experience
https://direct.lc.chat/10104497/

Daily Blogs:
https://www.mtrcustomleather.com/blog-2/blog/

FAQs Questions are Answered:
https://www.mtrcustomleather.com/faqs/

Join our loyalty Program/Brand Ambassador:
https://www.mtrcustomleather.com/contact/


DIY Leather Gift Tags

DIY Gift Tags:


Project Summary: Add a bit of sparkle to your gifts with these simple, yet beautiful leather gift tags.
Perfect for any occasion, these tags are not limited to just Christmas time!

What You Need:
Hermann Oak Leather Craft Sheet
Steel Square
Art Knife
Scratch Awl
Mallet
ProDye
Alphabet Stamp Set
Angelus Paint
Glitterlites Paint
Paint Brush Set

***All items can be purchase here: https://www.weaverleathersupply.com/?ref=mtrcl

Step-by-Step Instructions:

Step 1: Cutting Tags
Mark and cut your leather pieces into roughly 2” wide x 3” long rectangles. The size is really up to
preference, you can do smaller or larger.

Step 2: Trimming Corners

I wanted my tags to have clipped corners, so I measured ½” in on the top and down the sides and cut
according to my marks. I varied the measurements a little bit so some tags have a more narrow top.

Step 3: Stamping
Time to stamp! If you are using natural veg tan leather, use a sponge and wet the leather so the stamps
will sink in nicely. The English bridle leather does not need to be wetted.
I used ¼” and 1/8” letter stamps. Again, this is up to preference. I was also looking for a more rustic look
so I did not use a straight edge, I just went for it and I really liked the outcome!

Step 4: Dyeing
Apply dye if desired. I skipped this step, but if you are using natural leather and you want it darker, now
would be the time to dye the tags. We recommend Fiebing’s Pro Dye and you can either dip dye or
brush it on.

Step 5: Tape Off Painting Area
Use Frog tape or painter’s tape to tape off the area you will be painting. You can do straight lines or
diagonal. I also did a fun triangle; the sky is the limit

Step 6: Painting
The paint I used was Angelus® Paint in Light Gray and Glitterlites Silver Spark. Putting a coat of paint first
and then the Glitterlites on top ensures the glitter covers the leather more evenly. I like a lot of glitter so
I did 2-3 coats for maximum shine. I did a few tags with Glitterlites only (top right) and they turned out
ok but I do like the ones with the paint underneath better.

Step 7:

Let the paint dry completely and then remove the tape.

Step 8: Add Strings
Take an art knife or utility knife and make a small slit at the top of the tag. This is where the string will
loop through. I used a scratch awl to widen the opening once the slit was cut. Take a piece of string or
thread (approx. 8” long), double it and slide it through the opening, bring the ends of the string through
the other looped end and pull tight.


***All items can be purchase here: https://www.weaverleathersupply.com/?ref=mtrcl

Scroll to top