Leather Care

This category helps you find the best way to maintain your leather products.

LEATHER BREAK IN INSTRUCTION AND LEATHER CARE FOR MTR CUSTOM LEATHER PRODUCTS

A Guide to our Product
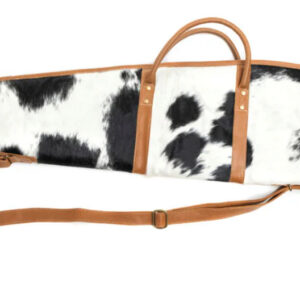
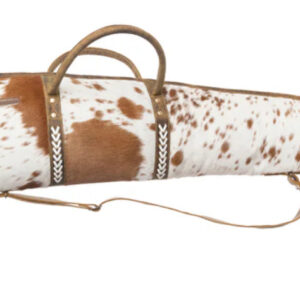
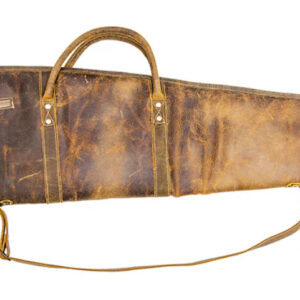
 Leather Holsters

And Accessories


 MTRCUSTOMLEATHER.COM

5052 DOC HAYWORTH RD RAMSEUR, NC 27316

(336)879-2166 SALES@MTRCUSTOMLEATHER.COM


 LEATHER BREAK-IN/FIT


MTR Custom Leather holsters/leather products are manufactured from only the premium materials and our technique molding is very accurate to specific firearms. When you receive your leather product from MTR it may appear to fit close-fitting at first, but this by design. MTR engineer our product to fit snug knowing that the leather filaments will relax and give to the proper fit with use.


UNLOAD YOUR FIREARM before testing holster fit.


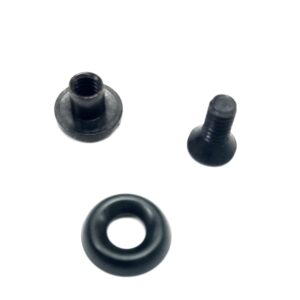
If the holster/magazine has tension screws: Since the tension components are not pre-set at the factory, you may need to adjust them to the holster your firearm or magazine the first time. We recommend that you check your tension screw adjustment before each use. There is no reason to completely remove the tension components. Do not use Loctite or any other form of Loctite on the tension components. Nevertheless, you can apply a single drop of clear nail polish to your tension screw threads, this may reduce loosening.


If the fit is too tight when holstering your firearm/magazine the first time, than don’t force it. If you do force the firearm/magazine into the leather, it may be very difficult to draw/remove. Instead, please follow these 6 simple steps to break in your new leather.


  1. Place the UNLOADED firearm or magazine in a plastic freezer bag, or 2-3 layers of clear plastic wrap. Do NOT cover the grip.
  2. Insert the bagged/wrapped firearm/magazine gradually into the leather, lightly twisting it side to side to minimize tearing of the bag/wrap.
  3. Once the firearm/magazine is completely seated in the leather, twist it about 1/16” in both directions 7-13 times.
  4. Allow the bagged/wrapped forearm/magazine to sit in the leather for about 16 minutes.
  5. Remove the firearm/magazine from the leather and remove the bag/wrap from the firearm/magazine.
  6. Insert the UNLOADED firearm or magazine into the leather, which should be snug but not loose. If it is still too tight, repeat the above steps until the leather is broken into your satisfaction.


If your Holster has a thumb break/ retention strap: You may need to stretch the retention strap before you get it to snap. With your fingers only (no tools, water, chemicals, or etc.). You may need to break in the holster first by using the 6 simple steps above.


  1. Place your UNLOADED firearm in the holster.
  2. Hold the firearm grip in your dominant hand and the thumb break strap/retention strap in the opposite hand.
  3. Prepare the strap for stretching by grasping the snap and pulling the strap firm (remove the slack).
  4. Twist the strap about 90 degrees back and forth in a clockwise and counterclockwise rotation about 10-15 times while keeping it firm.
  5. Firmly push the firearm away from you while pulling on the strap and continue rotating the strap.
  6. Release the tension for a moment and repeat 3-4 times as needed.
  7. Pull the strap over the back of the firearm without releasing tension.
  8. While maintaining the strong tension attempt to snap the retention strap closed.
  9. Repeat step 5 and 6 as needed.


Following and repeating the above instructions is the only way to an ideal break –in and long service life and proper fit that will last many years.


It is common for the inside of the leather to scratch from a single holstering, that is known as etching. A smooth leather lined holster will be even more subject to this normal occurrence. After this initial etching, the holster will custom fit your firearm.


When testing out MTR Custom Leather products for proper fitment, never place a loaded firearm in a holster without first testing.


Should any MTR product become worn, loose, broken, defective or ill-fitting, or in your opinion is unsafe, cease use immediately.

Maintenance of Leather


We use bull hide leather and horse hide leather. These hides are made from natural steer hides that are range bred and grown. Thus, there may be natural range markings in the grain of the leather. This is normal for top grain bull hide and horse hide leather. This adds to the beauty and character of your MTR products.


Following the instructions below will add to the service life of your MTR product.

Leather that encounters your skin or cloths will also encounter bodily perspiration (oils, sweat and etc.). Think of the leather as your skin being dried while being outside or dirty when in the woods hurting. The leather may become dirty on a regular basis and may need to be cleaned or treated periodically to slow the natural breakdown of the leather fibers.

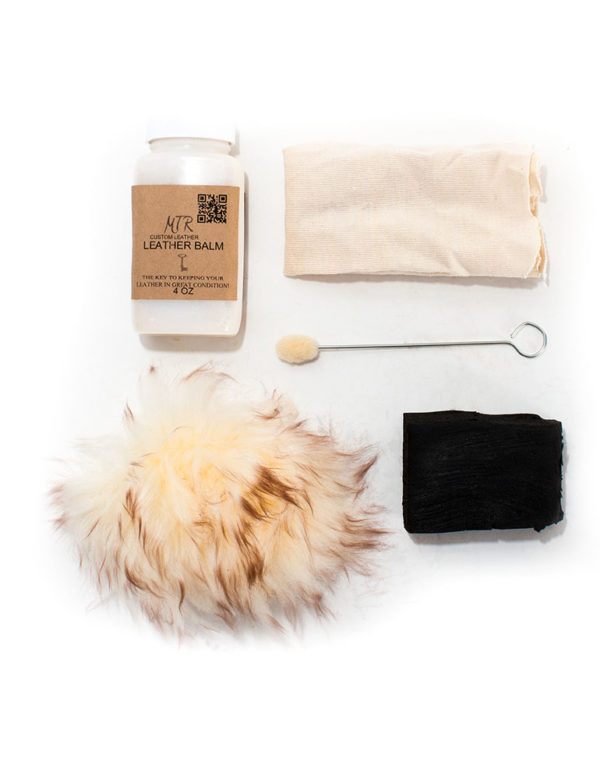
Steps for Carnauba Wax:

  1. Make sure your leather is dry (do not dry the leather with any artificial heat)
  2. Take MTR Custom Leather Carnauba Wax and shake well to avoid bubbles
  3. Apply the Carnauba wax with a soft cloth
  4. Allow the leather to dry naturally
  5. Take Sheep wool and buff the leather to a high gloss
  6. Application can be repeated


Carnauba Wax Benefits:

  1. Deep luster and shine
  2. Proven technology
  3. Naturally derived
  4. Resist fingerprints
  5. Resist scruff marks
  6. High gloss and shine


Carnauba is a thick base cream.


Steps for Atom Wax:


  1. Make sure the leather is dry (do not dry the leather with any artificial heat)
  2. Remove any surface dirt by using a piece of rubber foam (nothing hard, may damage leather fibers)
  3. Take the MTR Custom Leather Atom Wax and shake well to avoid bubbles
  4. Apply Atom Wax sparingly can use a dapper or soft cloth
  5. Work evenly into the leather
  6. Let dry
  7. Polish briskly with soft cloth for a natural finish


Atom Wax Benefits:


  1. Naturally derived
  2. Cleans the leather from dirt, debris, bodily fluids, etc.
  3. Penetrates deep into the leather fibers
  4. Easy to Buff
  5. Proven technology


Atom Wax is a watery base liquid.


Do not submerge or saturate your leather product in the waxes. Do not use any other kinds of oils on our leather product. Other oils may soften the leather too much.


CAUTION with carnauba and atom wax! Keep away from heat, flame, or sparks. If swallowed, call a physician immediately. KEEP AWAY FROM CHILDREN.


 Find us on FACEBOOK!

www.facebook.com/MTRCustomLeather


Check out our Website!

www.mtrcustomleather.com


Also find us on:

 ALL SOCIAL  MEDIA 


5 Things That Ruin Leather (and 3 Things That Fix it) | Gold Eagle Co.

5 THINGS THAT RUIN LEATHER (AND 3 THINGS THAT FIX IT)

The allure of leather cannot be denied–it’s durable, long-lasting, stylish, and easy to care for. Leather furniture in your home sets a tone for sophistication, and leather upholstery in your automobile looks almost regal. But while leather will last much longer than any other type of material, it is not impervious to damage. If not properly cared for and protected, the quality can suffer and deteriorate, and damaged leather just doesn’t look good at all.

WHAT CAUSES DAMAGED LEATHER?

There are a few simple things that can result in damaged leather–knowing what they are can help you better protect your leather furniture or upholstery and keep it looking pristine for many years.

1. EXPOSURE TO SUNLIGHT

Leather’s arch-nemesis is that big bright ball in the sky–the sun. Too much exposure to direct sunlight can not only affect the color of your leather, but also cause damaged leather that looks old and worn. Keep note if your leather furniture is exposed to sunlight on a daily basis through a window, or if the sunlight beams through your car windows. Consider moving furniture out of the direct path of sunlight, and park in shady areas or in your garage.

Damaged leather is commonly caused by exposure to sunlight.

2. EXTREME CHANGES IN TEMPERATURE

Damaged leather can occur if you move a piece of leather furniture from an area that is a relatively stable warm temperature to another area that is much colder or hotter. For example, moving a leather couch from inside the house to an outdoor balcony, or keeping your car outside if the temperature dips greatly at night.

To prevent damaged leather on your furniture, keep it in areas where the temperature stays the same. To better protect leather upholstery in your car, park your car in the garage at night to protect it from rises and falls in temperature.

3. NOT CLEANING STAINS RIGHT AWAY

It happens–from time to time, you or someone else might spill something on your leather. If you don’t take care to clean it right away, the stain can become permanent. A good leather restoration kit will have a protectant or other leather cleaning items that can help you clean the stain without damaging the leather, as products with harsh chemical can…

4. USE HARSH CHEMICALS AND SOAPS TO CLEAN YOUR LEATHER

Products with harsh soaps, detergents, and chemicals can actually result in damaged leather rather than clean leather. Look for specially made leather cleaning solutions and leather restoration kits to make sure that you are taking car of your leather properly–other products can cause dry, cracked, dull leather.

5. TOO MUCH HEAT

Keeping the house warm is nice and comforting, but if you’ve got your leather furniture too close to a heating vent, you could wind up with damaged leather. Keep the furniture away from heating vents, and again, park cars in shady spots or the garage.

3 THINGS THAT FIX LEATHER

1. A GOOD LEATHER CLEANER

For starters, have a good leather cleaner on hand to safely remove dirt, oil, stains, and other grime from your leather without the use of harsh chemicals.

2. A LEATHER RESTORATION KIT

If your leather is starting to look a little weathered, it might just need a little TLC to get it looking shiny and new again. Use a leather restoration kit to moisturize the leather and restore its look, as well as keep it protected from future leather damage.

A leather restoration kit can help moisturize, repair, and protect your leather.

3. OLIVE OIL OR BABY OIL

If you’ve got a scratch or small tear in your leather, do not despair. You can often use olive oil or baby oil to repair the damaged leather. Lightly apply the oil to the affected area with a cotton ball, allow to dry for an hour, then see how it looks. Repeat if necessary.

Source: 5 Things That Ruin Leather (and 3 Things That Fix it) | Gold Eagle Co.

A Guide to Leather – MTR Custom Leather Blog-Discussing Calf Skin Leather Hides??

There are many different types of leathers that are used on footwear these days. And many different styles to the same type of  so allow me to break down the most common options and tell you a bit about each, sharing what their plus and minuses, myths and all of the other opinions I might have on each.

Calfskin – Saying calfskin is like saying the word ‘car.’ It’s the general type of leather used to produce many of the sub types, like ‘crust’ or ‘box’ (aka , aka box ‘calfskin’ — see what I am saying?). It simply means that the leather came from calf, as opposed to a full grown cow (which in reality is the case most of the leather used in the high end shoe industry). Cow leather is simply not that great. Think about your 18 year old skin versus your 60 year old skin (no offense, but it’s a reality). That’s the difference between calfskin and cowskin.

The most common type of calfskins found in dress shoes are the following:

  1.  (below) –  is untreated (read as not dyed) leather. It is left intentionally natural in color in order to allow for a coloring process after the fact (i.e. not in the tannery, but rather by the shoe factory, a patina artist or some other 3rd party). A lot of what is on offer these days is crust calf and that is because a lot of people want a patina/aged/burnished look and doing this on Crust calf is best and easiest. Italians and the French have been the ones to really pioneer the use of Crust calf with their history of colorful shoes. Crust calf, not having been in the drum for dyeing, is usually softer than the other types of Calfskins. However, in some cases, this softness can result to heavier creasing so do beware of that. Everything comes with a trade-off. Also, because it is left untreated, it means that the leathers’ defects (scars/scratches/bites etc) are usually more prominent as they are not hidden by the dyeing process of the drums and finishing of the tanneries.
A Guide to Leather
Crust Calf
A Guide to Leather
Box calf
  • Box Calf (aniline – above) – Box calf is the most traditional and commonly used leather there is. It is simply a pre-dyed leather, like 99% of all black calf leather. Most likely any shoe that has a uniform finish is going to be made from Box calf. The English shoemakers have traditionally stuck with Box calf as they never got so much into patina and making Green/Blue/Red shoes (although this is changing 😊. Some notable tanneries producing Box calf are Weinheimer for Black calf, Du Puy and Annonay for everything else.

    Box calf will always be stiffer due to the dyeing process. And Black box calf will traditionally be the most rigid. Something about the black dye makes it harder than the rest. For creasing, well this will depend on the quality of the skin as I have seen Box calf hardly crease at all and then some that creased worse than anything else. In this department, there is no true rhyme or reason. But it is also generally thought of as being more resistant and durable with respects to its crust counterpart.

  •  (image below) – This is somewhat of a contradiction in itself but it’s common in the industry so let’s discuss it. Bookbinder/Polished/Shined calf is simply a way to take cheap leather and give it a top acrylic coating that hides all blemishes and leaves this plastic like look. It allows the shoemaker to buy cheap and sell high, tricking customers into believing that it is top quality calfskin when it is not. Italian brands have been doing this for years. Nearly all designer brands use this type of leather, quite frequently as it is a GREAT way to increase your profit margins. The lower priced welted English brands have been using this too for quite some time although I presume that their ideas for doing so might be more functional for the following reasons.

    Bookbinder is durable. Its top coating makes it nearly impenetrable. So if you live in a wet environment, then bookbinder leather can be a good option for you in order to not have your shoes so easily ruined or requiring constant upkeep. The downside is that it is extremely rigid which means it cracks easily, particularly in the vamp where the shoe creases during each step. And once it cracks, that’s it. There is no coming back from that. And it also scuffs easily and you can’t shine those scuffs out as it is in the acrylic, not the leather.

A Guide to Leather
Bookbinder – Image courtesy of Fratelli Rossetti

 –  is leather. Don’t be mistaken. It’s the underside of the hide i.e. the part that is inside the calf. For it’s long hair like textured appearance it has been loved and hated by many for years for various reasons. Let’s discuss the different types of  and the pro’s and con’s of each.

  1.  –  is simply the premium uncut suede that you typically find in the very high end, expensive shoes. You can tell that suede is full grain when it is super soft and when you rub your fingers over it, it drastically changes from light to dark depending on which way the hair is laying. The hairs of the suede will always be quite long on a . It will also have a shimmery sheen to it. It’s hard to explain but is more vibrant than the other suedes.
  2.  – Split suede is like bookbinder in a manner of speaking. They shave off the top layer of the suede, most likely as a way to hide less-premium cuts that have more noticeable blemishes were they to leave the suede uncut. Split suede is cheaper and more often than not seen as inferior. Its texture is not nearly as plush as full-grain suede and does not have as much of a contrast between light and dark when rubbing your fingers across the suede. Its hairs are naturally shorter.
A Guide to Leather
Split grain suede by J.FitzPatrick Footwear

Here are a few of my opinions on the matter of suede and the differences between full grain and split suede. Split suede is often bad mouthed but in reality most makers are using it and let me explain why. First of all, Full Grain is insanely expensive, nearly double (if not more) the cost of split suede. Of course it is nicer to feel but it is not better in terms of durability and I believe that is why it is not used as much. You don’t get double the lifespan from it and it is often more expensive than premium calfskins. It doesn’t age as well either as when those beautiful long hairs of the suede start to get worn down from wear and tear it simply does not look as nice anymore. It shows more so it’s wear and tear. Split suede on the other hand is not nearly as plush and elegant looking but it is durable and holds up well to wear and tear.

I once wore my snuff suede chukka boots (split suede) on a scooter in Paris and got caught in a hailstorm downpour. I got so wet that the shoes turned black. But when they dried, they dried just fine, evenly and the snuff went back to its original color. And that’s the beauty of split suede. When it comes from a good tannery, then its quality is still high and it wears very well. And on top of that, to be honest, it takes rain better and this myth that suede isn’t good for rain is simply garbage. Cheap suede is not good for rain. Sand suede is not good for rain. But Snuff suede and darker takes bad weather like a charm and in fact, I prefer to wear my suede on wet days than my leather. The only thing one must do is remember to steam and brush your suede once it has dried. Do that and you will forever have good suede.

A Guide to Leather
Grained Brogues by Crockett & Jones

Grain Leather – Grain leather is simply a stamped calfskin. Its look is not natural and is created by the tannery. You buy leather in different thicknesses when buying from the tannery and I want to say that Grain leather is typically a touch thicker than your traditional calfskins as it needs to be when having that texture finish to it. You tend to find grain leathers on models that are more for adverse weather as its textured finish usually hides wear and tear better than a smooth surface does. Some of the more notable grain leather is the dress shoe industry are:

  1. Pebble Grain (shown above) – This is quite the prominent grain and is often used on boots and/or shoe models like full brogues. This is the grain that really takes the weather well as its thick pebble-like finish allows for the ultimate beat up without showing too much wear and tear. The English shoemakers are quite fond of using this type of grain to combat that rainy environment and particularly for those that live in the countryside, want to dress smart and maintain a good pair of shoes. A country brogue or boot is nearly always grained.
  2. Pin Grain – Somewhat like the pebble grain in look, the pin grain is simply a much smaller design of grain, that looks like it could have been made by pin dots. For some reason, its finish is often shinier and I never knew why whereas pebble is always matte. You tend to find pin grain in the higher end shoemakers as it is more fine grain and truth be told, not so sure as to how it holds up to the adverse weather as I have never had a pair. But it’s nice for having something different than calfskin and still being able to maintain elegance through its subtle appearance.
  3. Hatch Grain (shown below) – This grain has taken the industry by storm in the last 10 years. It’s a softer grain all around and much more subtle than it’s pebble-like counterparts. Due to this softer nature, I personally find it more dressy or at least the ability to wear it with more dress attire whereas, for me, I see pebble grain as casual and hence why you often find that on boots or full brogues. But good old Hatch grain is found on all models, even smart oxfords or dressy loafers. It’s the new age grain that many customers seek but that is still somewhat rare to find as it has not fully caught on to being always on offer by all of the tanneries. The only downside is that I don’t believe this grain takes as much wear and tear as the others do.
A Guide to Leather
Shoes by Lof & Tung of Skoaktiebolaget

There are many more variants of leather used in the industry, like Cordovan and a million other types of grain, but the ones in this post make up the majority of what is found on the dress shoes of today.

Knowing the differences will help you make informed decisions about your purchases.

I hope that you have all enjoyed this post. Please share to spread the knowledge!

Justin FitzPatrick


Source: A Guide to Leather – The Shoe Snob BlogThe Shoe Snob Blog

How leather is Made?

[ 4 minutes reading ]

Making leather is a slow and technical process that has to be followed with precision and care in order to produce a high-quality leather with the same finish each time.

Keep reading to find out how it is actually made.

The process will start with an animal hide and by the end of the journey there will be a piece of leather ready to be transformed into a bag, clothing or any other leather product.

Here the 5 phases of creating a leather item.

RAW MATERIAL

Leather can be made from the hide of almost any animal including pigs, sheep, goats and crocodiles. However, the most common hide used is the cow.

The art of making leather uses hides that would otherwise be destroyed.

by making leather items, the animal’s hide is turned into a beautiful and useful material that will last for decades.

Of course, the upbringing of the cow will affect the quality of the hide, for instance, cows that have been branded, been exposed to a lot of insect bites or  kept near barbed wire fences can have imperfections on their hide.

When you have a clean hide, you need to salt it or place it in a salt brine. The salt will stop the hide from decomposing.

The hides tend to be stored, salted and folded with the flesh sides touching and will remain salted until ready to be processed when it should be soaked in water to remove any dirt or other materials.

If a hide has hair on it then they must be removed. You can do it by using chemical solutions that contain calcium oxide. This may be called a lime bath.  If you don’t want to use chemicals and be eco friendly, you can remove the  the hair by hand.

After this process you can split the leather in two layers. The upper part of the leather has the highest quality , it’s also called full grain leather. This is due to the fact the upper layer has a much tighter fibre structure making it more durable. When treated correctly this layer is stunning. The bottom layer of the hide will be kept for cheaper leathers with less overall quality than the top layer.

TANNINGtanning

Now that the hide has been prepared, the second stage in the leather-making process is called tanning and will convert the hides into leather through preserving the material and stopping decomposition.

Now the hides need to be loaded into a  tanning drum along with a special tanning solution. This drum will contain a mix of either vegetable tanning agents or a chromium salt mix. In general, vegetable tanning mix, which contains tannin extracts naturally found in tree barks, will produce a leather that is flexible and is generally used for luggage or furniture. Chromium salts produce a more stretchable leather so will be typically used on products like clothing or handbags.

After this drying process, the hides can then be inspected and separated in levels of quality. The grades of leather will determine what that hide will be used for in the future. 

RE-TANNING

second tanning process can occur again in order to get the leather fully ready for its intended purpose. This is something that can be done for both vegetable mix and  chromium salts.

Once the tanning process is complete the hides need to be dried. This drying can occur with a variety of processes such as air dried or vacuum dried.

During the re-tanning stage a bleaching agent can be used and this provides an excellent base to start the leather dyeing stage.

DYEING

P00177950

The leather dyeing process is what gives the wonderful colour to a finished leather design. This can be anything from the browns and blacks to bright and bold colours.

The actual dyeing process can be incredibly lengthy with hides needing to be added to a large drum along with their chosen dye for a long period of time to ensure the dye takes. After around 8 hours a cutting should be taken to ensure that the dye has completely saturated the hide. Otherwise the leather will look patchy. Afterwards the leather needs to be rinsed thoroughly to remove any residual dye or chemicals. Once rinsed the hide should be dried entirely.

FINISHING

When the dyeing process is complete, the last stage in the leather-making is the finishing. This is the stage where the leather will be worked to ensure that it is soft and flexible. You can also apply products to make the leather glossy.

The last stage of the process will be a quality check to ensure the leather has the correct colour and that there are no flaws on the leather.

Caring for Elephant Skin Leather Products-Holsters, Belts, Rifle Slings and Many More Products from MTR Custom Leather 

Caring for Elephant Leather Skin Products

FYI:

Elephant is an exotic leather that is thick and very durable with a course, rippled texture. MTR Custom Leather uses quality elephant leather from African origin. MTR Custom Leather follows the strict requirements of the Convention of International Treaty of Endangered Species (CITES) permits. Read more information on the legality of harvesting elephant hides from Bloomberg News.

By purchasing an MTR Custom Leather product made of elephant leather, one has achieved one of the most valued and precious leathers in the field of exotic leathers. It is also a very demanded leather in the market for its exclusivity. Not everyone can have an elephant item since its sale requires strict controls. Today we will give you some tips to know how to take care of genuine elephant leather. So that your products stay in excellent condition for much longer.

First, even though this leather is very resistant, you must bear in mind that you took a fine product. Therefore, you must use it with special care. Never expose this leather to sunlight in an extreme way, as it may lose its color and be affected. You have taken one of the leathers with greater resistance, but that does not mean you should neglect it.

To clean MTR Custom Leather elephant skin leather, you can clean it with a slightly damp cloth, never wet. Wait for the leather to dry and lightly rub with a suede sponge. Can also use Retile Cleaner https://www.mtrcustomleather.com/product/w-6-fiebings-reptile-cleaner/ to get the dirt and grim off your leather products.

Remember that you should NEVER polish this type of leather, as it would lose its natural finish. What you can do is to apply repellent, for greater care. Repellent such as Natural Atom Wax https://www.mtrcustomleather.com/product/natural-atom-wax-4-oz-w-2/.

One can also purchase MTR Custom Leather Care https://www.mtrcustomleather.com/product/leather-care-kit-w-3/. This includes a 5 piece cleaning set including a 4 oz bottom of natural atom wax.


Leather Care Kit (Kit contains 1 each): *       4-ounce bottle leather cream (cleaner/conditioner) *       Cleaning Cloth *       Wool Cloth *       Foam scrub pad *       Application dauber MTR leather care kit is specially formulated to gently clean, condition and preserve the finish on leather products. The care kit helps to remove surface dirt and provide water resistance. MTR Custom […]

Source: Leather Care Kit (W-3) — MTR Custom Leather

Shark Leather Care – MTR CUSTOM LEATHER, LLC 

Shark leather is one of the strongest leathers on the market. Known for being seven to 11 times stronger than cow leather, shark leather offers the durability needed for work garments and the beauty you desire for high-fashion garments.

Shark skin is also known for its rough, textured surface. This gives each piece crafted from shark leather a unique appearance. When carefully tanned, the roughness is toned down so the material works well for shoes, handbags, wallets and belts, offering a slight texture without too much roughness.

Leather Conditioner & Cleaner for Shark Leather

If you own a piece made from genuine shark leather, your first goal is to keep it strong and well-maintained. Durability can be compromised without the proper care. Cleaning and conditioning the leather well will ensure that you get many years of use and enjoyment from your leather item.

Like all leather, shark leather needs moisture to remain soft and strong. Without moisture, the leather will dry out, and this will compromise the strength of the material, making it brittle and susceptible to cracking.

To care for your shark leather use Leather Honey leather conditioner. Leather Cleaner is easy to use and will not dry or damage your leather. Simply dilute the cleaner and spray a bit of it onto the leather, then wipe away the cleaner along with any grit and grime. Allow the leather to dry before moving on to the conditioning step.


How often should you use our leather conditioner & cleaner for shark leather? The answer depends on how much use your shark leather piece gets. The shark leather should be cleaned whenever it gets dirty, and it should be conditioned regularly.

You have invested much into your beautiful shark leather piece. Keep it soft and protected. Using A leather conditioner and cleaner products, you can provide your shark leather with the moisture it craves, so it will stay beautiful and functional for years to come.

CHECK OUT MTR CUSTOM LEATHER LEATHER CARE PRODUCTS!

Source: Shark Leather Care – Leather HoneY 

Do you know the difference between Leather dye and Leather paint?

Leather dye and leather paint are 2 main elements in the leather crafting world. They sound similar but the purpose is different.

Are you ready to talk about this difference with us?

Leather is like wood. It can be stained (dyed) or painted (pigmented finish or coating).

Leather dyes penetrate and accentuate the natural variations in the fiber. Dyes are in the leather   (chemical bond).

Leather paints and pigmented finishes coat the fiber; they are on the leather (a physical bond). They can be monochromatic or multiple colors, tones and effects.

Vinyl (a synthetic) cannot be dyed; it can only be refinished.

Dyes are prone to fading and transference (just as blue jeans can stain furniture). Most leathers are dyed. The variable that changes is the final finish. Some have no finish (aniline) or a light clear finish (semi-aniline). Some leathers (like those in auto interiors) have a pigmented urethane or acrylic finish that better retains color and resists stains.

Leather cannot be dyed lighter color. Only a pigmented finish (paint/coating) can achieve this.

Having said all of that in our products range you can find:

LEATHER EDGE PAINTS 

LEATHER DYES

The purpose is the same of what we were talking before, the first stays on top of the leather ( in this case leather edge), the second penetrates into the leather fibers.

Any questions on this topic?

Source: Do you know the difference between Leather dye and Leather paint?

Leather Holsters Care and Maintenance

LEATHER CLEANING

Wipe down your leather products with a clean dry cloth after every use. A gentle cleansing with warm water and glycerin soap can be done if the leather becomes soiled. Brush on with a soft-bristled toothbrush, rinse and pad the leather with a dry cloth until it remains just slightly damp. Allow the product to air dry the rest of the way.

LEATHER STORAGE

When not in regular use, store your leather products in a cool, dry location. They can be wrapped in a soft cotton cloth and stored in their own box or hard case where you might keep clothing or important documents. Cool and dry is ideal. If you leave your handgun in the holster or other product, check it daily for moisture, condensation or corrosion. And remember to take your leather holster out of storage periodically to check its condition, wipe it down and remove any dust.

ADDITIONAL LEATHER TIPS

In addition to your regular cleaning routine, these tips will help you care for your leather products.

Use leather conditioners sparingly. Leather conditioners are specially formulated to loosen and moisturize leather as needed. Because MTR Custom leather is hand finished with our special leather dressing, should your leather product become dry or scratched, you can treat the exterior with a commercial leather dressing that does not contain lacquer. (Be careful when using Neat’s foot oil; large amounts will soften the leather.)

Protect leather from perspiration. Placing a barrier such as a t-shirt, coat or the waistband of your pants between your skin and your holster will ensure your leather holster is protected.

Treat the interior of your holster with spray silicone to help protect against excess moisture. Spray silicone also speeds the draw by reducing friction.

If your product becomes water-soaked, reshape it as best you can and allow it to air-dry at room temperature. Do not use a hot oven – it will shrink, harden and crack the leather.

Brass cartridges or other brass hardware when stored with leather will acquire a greenish residue called “verdigris.“ It is a natural product of a chemical reaction between brass and vegetable-tanned leather, and it wipes off.

To keep your leather goods in the best condition and allow them to age naturally and gracefully, avoid the following:

  • High humidity. Humidity can cause your leather product to mildew over time.
  • Direct sunlight and high heat. Direct sunlight and high heat can cause your leather holster and other products to become brittle and dry, and could cause the material to crack or fade. Changing atmospheric conditions, heavy perspiration and other factors could create such conditions.
  • Storing your leather goods in the trunk of your car, shed, garage or attic where heat or vermin/pests could be a factor.
  • Saddle soap or other conditions that could over soften the leather.
  • Areas of high salt content/sweat can degrade the leather quality.

MTR Custom leather holsters are available in a wide variety of types

Source: Leather Holsters Care and Maintenance

Scroll to top