MTR Custom Leather Shoulder Rig Instructions –
About:
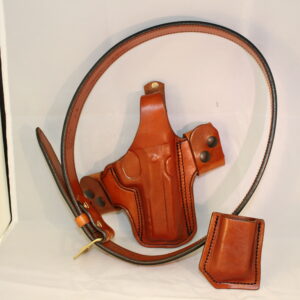
MTR Custom Leather shoulder rigs not only profound in concealment, function and comfort, they also accommodate changes in the user’s carrying routine. You can purchase individual horizontal or vertical shoulder holsters only to accommodate different handguns. A second holster of your choice can be added to the same shoulder rig to create a OO7 rig. All shoulder rigs comes with one holster, one double ammo pouch and ties for each.
Assembly:
- Verify contents of bag. Each shoulder rig should include: one holster, one double ammo pouch with tie downs on each.
- Check fit of your gun and ammo pouch, then break-in as needed. Please follow the instructions on the back of your thank you letter for a guide to break in your leather goods.
Tie-Downs:
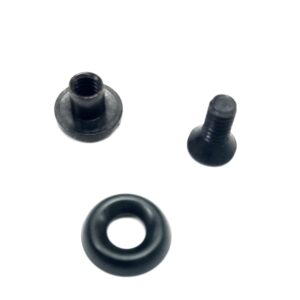
Tie-downs are designed to anchor the shoulder rig components to your gun belt. Tie-downs are optional items and are used as a matter of personal preference. You can take on the attached tie downs by easily un-snapping the directional military snap (Refer to small instruction sheet on how to work the military directional snap).
- Tie-downs to connect ammo pouch to gun belt
- Tie-downs to connect holster to gun belt
- Tie-downs allows for the harness to stay in place when in movement.
Instructions:
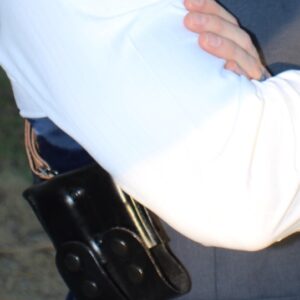
- Put your empty shoulder rig on like you would a coat or, some prefer to put it on over there head like a t-shirt. The flexible swivel base plate located on the back of the shoulder rig with 4 screws should be centered between your shoulders blades below the base of the neck. Make sure that the natural color side of the shoulder rig is against the body and the smooth color side is facing the outside. This will allow friction and stability of the shoulder rig on your clothing. Also, sweating or body oils will not affect the natural backing. It will actually allow for a more comfortable feeling.
- Insert the unloaded handgun and magazine/speed loaders in there pouch.
- Adjust the ride height and cant position of the holster and ammo pouch to the most concealable and comfortable fit for your body type. This adjusting process of the shoulder rig is critical; spend the time to get the correct correct fit. A rig that is set up in a hurried fashion results in a sloppy fit and compromised function. Many users find it easier to have another person adjust the shoulder rig for them while they remain stationary. This can be done by adjusting the screws on the each strap of the rig. Adjusting the the holster and ammo pouch consist of 2 straps each. To angle the rig, one strap may be higher than the other strap.
- Once it’s fitted correctly, remove shoulder rig carefully, trying to not alter the adjustments.
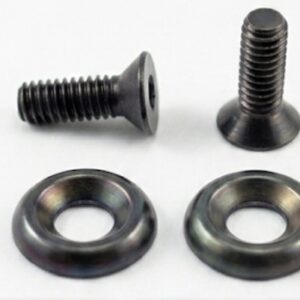
- Secure all hardware in place. Ensure that all screws are tighten snugly. Applying a small amount of clear fingernail polish to the threads will minimize screw back-out.
- Put shoulder rig back on and recheck all adjustments.
- When you are absolutely certain of all adjustments you may trim off excess leather straps length. Please consider the following:
- It often may require wearing the shoulder rig for several days before fine tuning is complete.
- Before permanently shortening the rig, keep in mind future use with seasonal clothing, body armor, weight fluctuations, etc.